Hosting Thanksgiving in a Small Kitchen: 17 Space-Saving Ideas + a Prep Timeline
Cooking a full Thanksgiving dinner in an apartment galley, studio kitchenette, or compact single-oven kitchen does not require cutting your menu in half. The key is shifting from simultaneous cooking to staged preparation, vertical storage, and off-oven heat management. Below are 17 numbered space-saving ideas—followed by a day-by-day preparation timeline and single-oven rotation schedule—designed to keep your counters clear, your refrigerator organized, and your meal hot on the table.
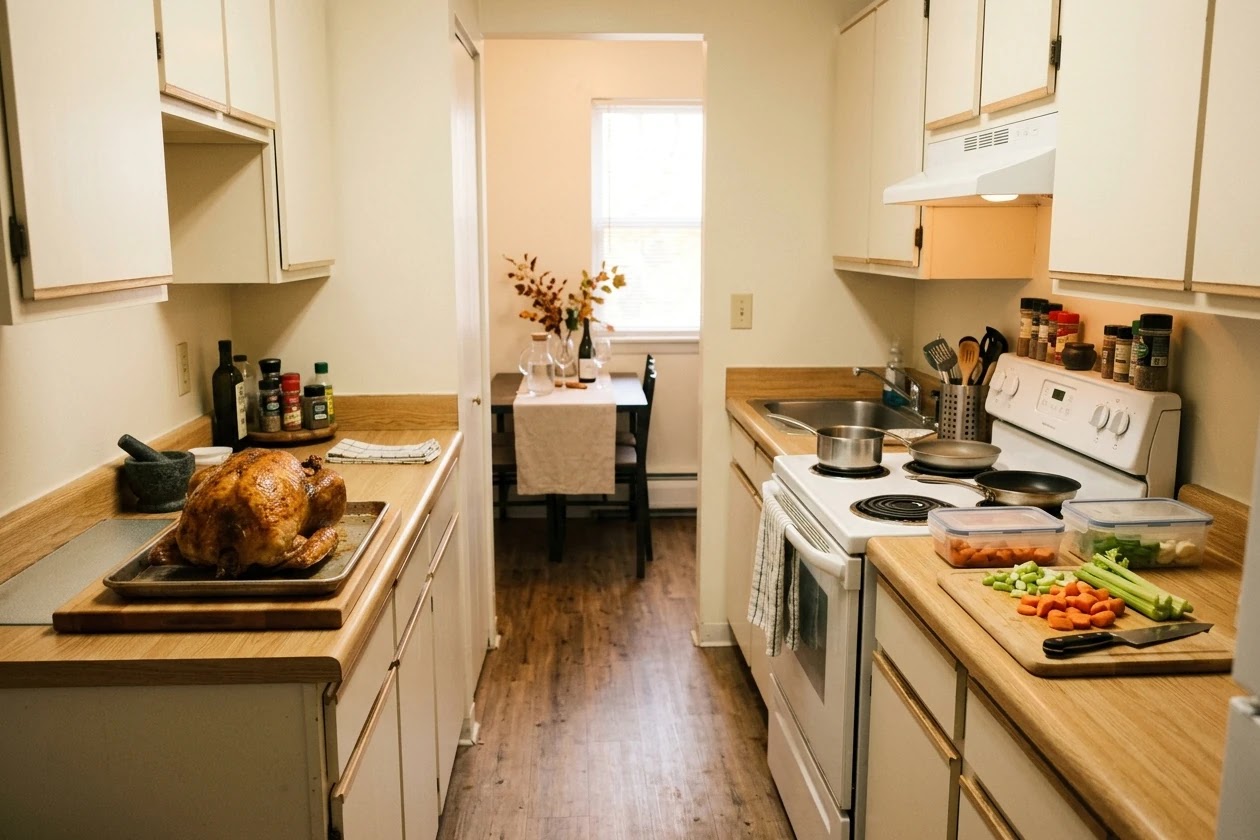
Most Thanksgiving kitchen stress is not caused by difficult recipes—it comes from four simultaneous physical bottlenecks colliding between 11:00 AM and 4:00 PM on Thursday: refrigerator shelf gridlock, horizontal counter saturation, single-oven congestion, and sink basin backup. The 17 space-saving ideas below resolve each bottleneck in order, followed by a complete Sunday-to-Thursday prep timeline and single-oven rack schedule.
Top Tested Picks for Fast Decisions
1. Evict Condiments & Beverages to an Insulated Cooler
Bottles of sparkling water, white wine, cider, beer, soda, and everyday condiments (hot sauces, pickles, jams, salad dressings) monopolize valuable vertical shelf height. On Sunday before Thanksgiving, move all shelf-stable unopened drinks to a hallway closet and chill Thursday's beverages in an ice-filled cooler placed in the dining corner. Consolidate rarely used condiment jars into a single deep bin on the bottom door rack so your main refrigerator shelves stay clear for thawing the turkey and storing prepped sides.
No-Purchase Alternative: If you do not own a hard-sided cooler, line a clean laundry basket or deep stockpot with a thick bath towel and heavy-duty freezer bags filled with ice cubes to chill wine, cider, and sparkling water on Thursday afternoon.
2. Store Prepped Ingredients in Flat-Lid Stackable Food Containers
Round mixing bowls covered in plastic wrap waste shelf corners and cannot support weight on top of them. Transferring diced onions, celery, cubed bread, cranberry sauce, and gravy base into rectangular stackable glass or BPA-free food storage containers with flat, recessed lids lets you build stable three-high vertical columns on a single refrigerator shelf while keeping every prepped ingredient visible at a glance.
No-Purchase Alternative: Flatten chopped vegetables and make-ahead components inside quart- and gallon-size zip-top freezer bags, press out excess air, and lay them flat like file folders on a dinner plate or baking sheet so they stack neatly without sliding.
3. Group Recipe Components in Clear Refrigerator Organizer Bins
Small packets of fresh sage, thyme, shallots, butter sticks, heavy cream, and lemons easily vanish behind large casserole dishes in a packed apartment fridge. Using clear pull-out refrigerator organizer bins turns deep shelves into slide-out drawers. Dedicate one bin to "Stuffing & Gravy Aromatics" and another to "Pie & Baking Dairy" so you can pull the entire recipe kit onto the counter in one motion instead of holding the refrigerator door open while searching.
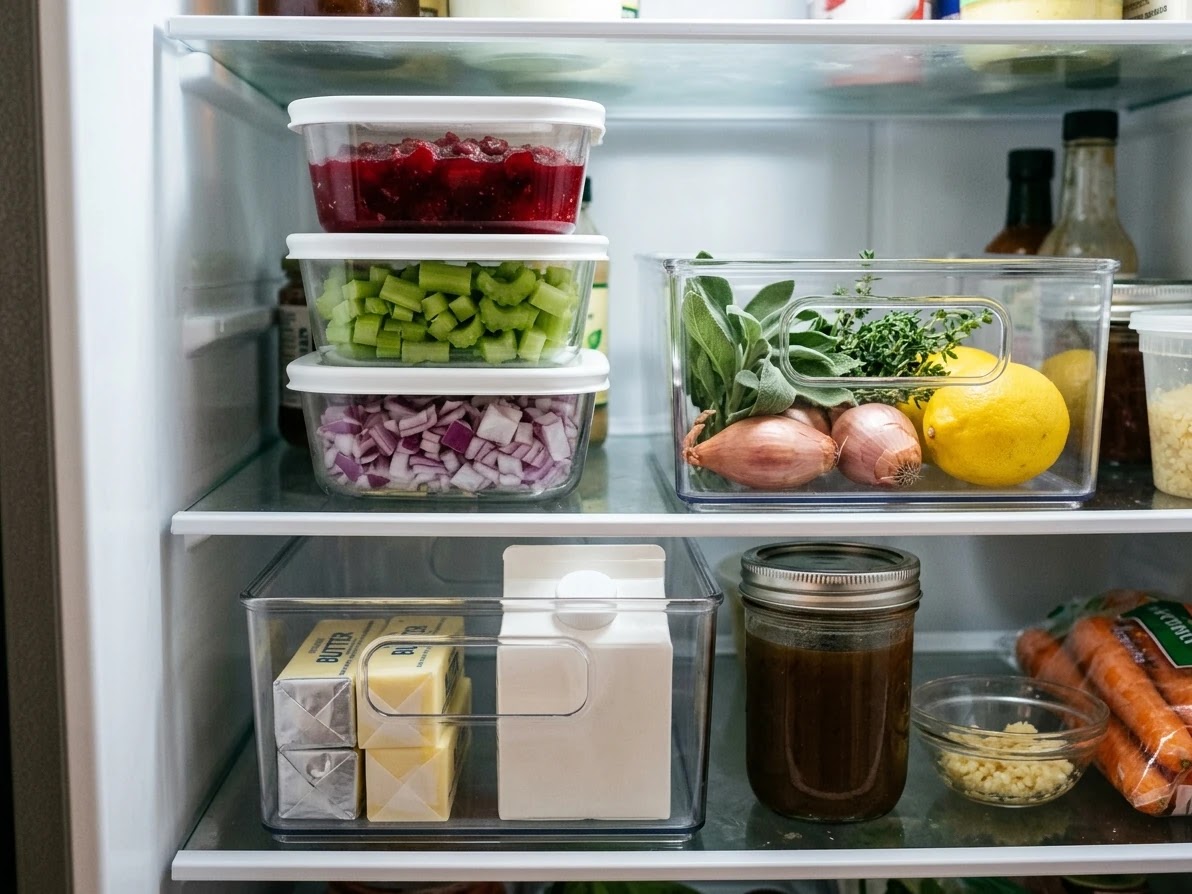
No-Purchase Alternative: Repurpose narrow cardboard 6-pack beverage carriers, clean berry punnets, or shallow loaf pans as pull-out refrigerator caddies for herbs, butter, and aromatics.
4. Dry-Brine on a Rimmed Half-Sheet Pan Instead of Using a 5-Gallon Bucket
Wet-brining a turkey in a deep stockpot or five-gallon bucket requires removing an entire middle refrigerator shelf. Instead, season the bird inside and out with kosher salt, a pinch of baking powder, and herbs 24 to 48 hours ahead, and rest it on an aluminum rimmed half-sheet pan fitted with a wire cooling rack on the bottom shelf. Even better, spatchcocking (removing the backbone so the turkey lies flat) drops the bird's profile to under five inches tall, allowing it to slide into a standard shelf slot without removing racks.
No-Purchase Alternative: Place the dry-brined turkey inside your existing roasting pan or a 9×13-inch baking dish lined with crumpled aluminum foil coils to elevate the bird slightly above any collected juices.
5. Create an Over-the-Sink or Cold-Stovetop Cutting Board Bridge
During Tuesday and Wednesday vegetable prep—when burners are turned off—your stovetop and sink basin are untapped horizontal real estate. Laying a wide hardwood or composite cutting board across the sink basin (leaving a small gap at the corner to rinse produce) or across cool burner grates with a damp microfiber towel underneath prevents slipping and doubles your chopping workspace.
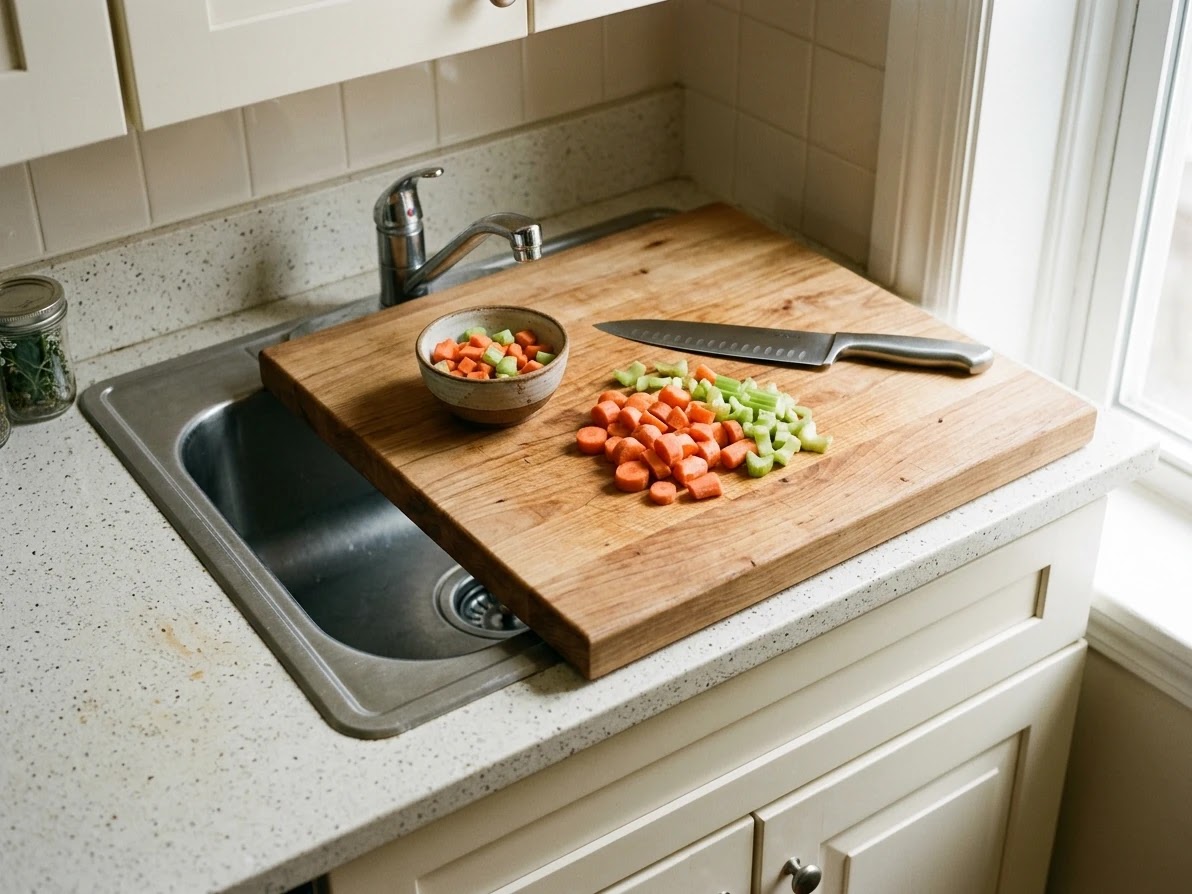
No-Purchase Alternative: Invert an existing 18×13-inch rimmed baking sheet over cool, turned-off stove burners (with a damp dish towel underneath for grip) and place your standard cutting board on top. Always verify all burner knobs are off before placing anything on the range.
6. Use Half-Sheet Pans + Stackable Cooling Racks as a Multi-Tier Prep Tower
Two pies, a pan of dinner rolls, and a casserole dish will completely cover a four-foot counter if laid side by side. By pairing heavy-gauge aluminum half-sheet pans (18×13 inches) with foldable or stackable wire cooling racks, you can cool two pies on the upper tiers while staging chopped vegetables or unbaked side dishes underneath in the exact same 18×13-inch counter footprint.
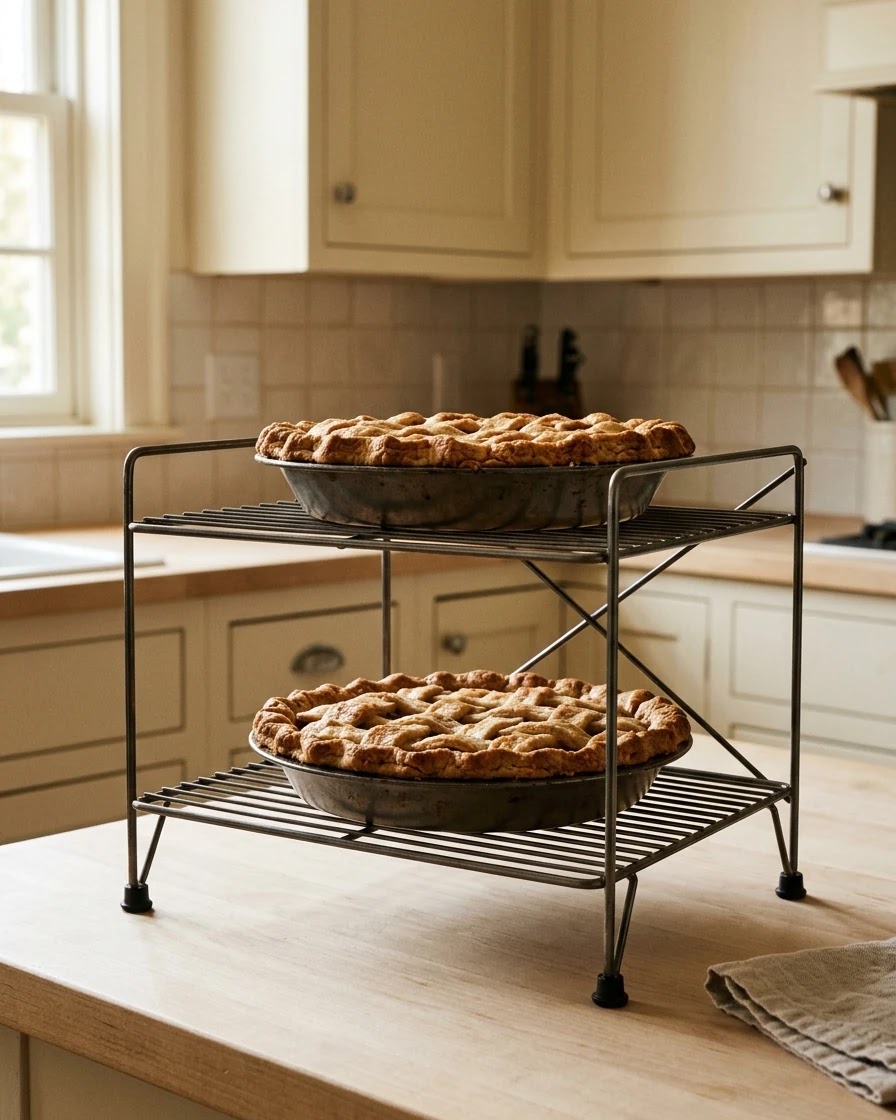
No-Purchase Alternative: Place four matching coffee mugs or unopened soup cans at the corners of a baking sheet and set a second baking sheet or spare oven rack on top to create an instant two-level cooling bridge.
Expandable Over-the-Sink Bamboo Cutting Board with Strainer
Adds 2.5 square feet of instant food prep surface directly over standard kitchen sinks, featuring a removable silicone collapsible colander for easy rinsing under $35.
The Exact Spec That Wins: Extends from 16.5 to 24.5 inches across sinks, crafted from food-grade antimicrobial bamboo.
Honest Trade-Off: Bamboo requires occasional food-grade mineral oil conditioning to prevent moisture warping.
7. Box Up Everyday Countertop Appliances in a “Holiday Furlough Bin”
Toasters, blenders, countertop knife blocks, paper towel stands, fruit bowls, and decorative canisters quietly consume up to half of a small kitchen's usable counter depth. On Wednesday evening, place every small appliance and counter accessory not strictly required for Thursday's menu into a laundry basket or storage tote and store it in a bedroom closet until Friday morning.
No-Purchase Alternative: Use a clean cardboard moving box or laundry hamper tucked under a bed or at the bottom of a coat closet for 36 hours.
8. Move Peeling, Tearing & Pie-Rolling to the Dining Table
In a narrow galley kitchen, two people standing back-to-back cannot open the oven or dishwasher door safely. Relocate dry, low-splash prep tasks—peeling potatoes and carrots, snapping green beans, tearing bread for stuffing, rolling pie dough, and folding napkins—to the dining table or coffee table lined with parchment paper or a washable tablecloth.
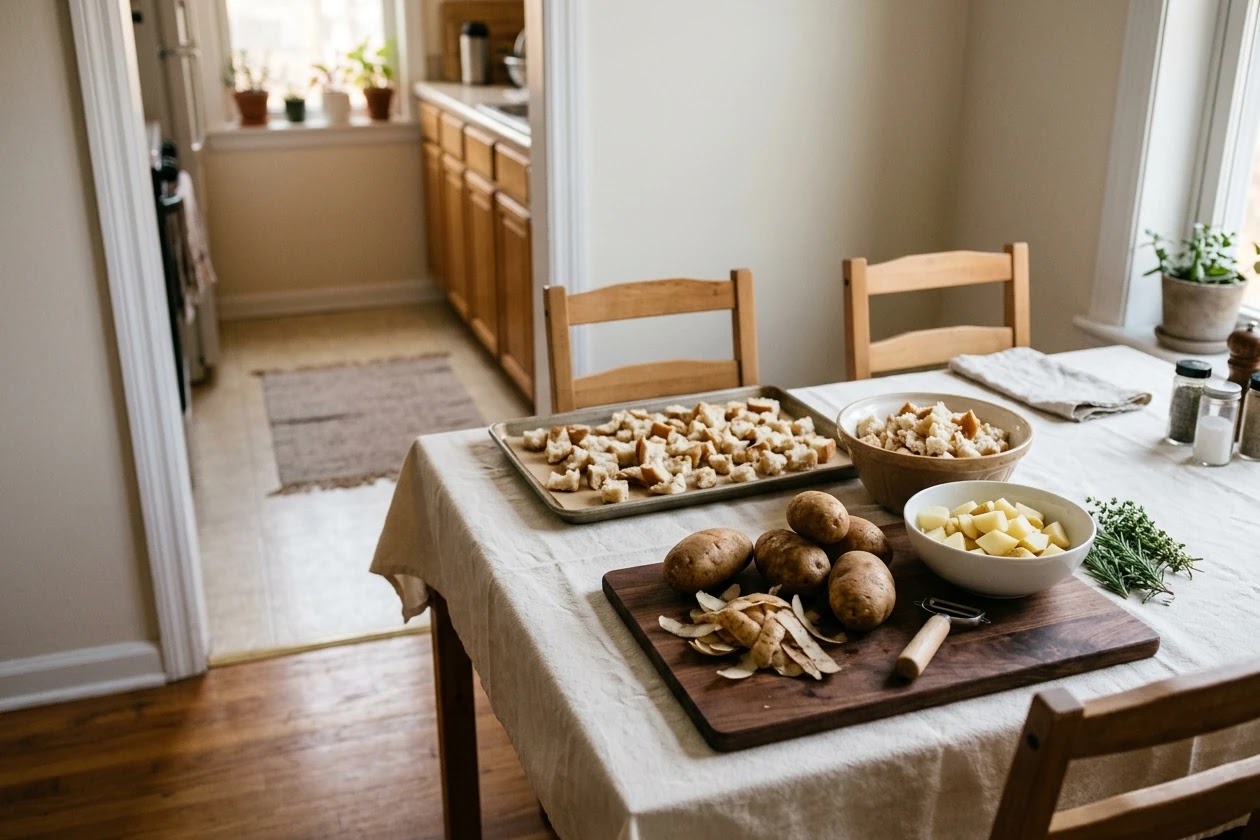
No-Purchase Alternative: Spread a clean brown paper grocery bag cut open flat across the dining table to catch potato peels and herb stems, then fold and compost or discard the entire sheet in seconds.
9. Hang an Over-Cabinet Scrap Bag & Pre-Measure by Cooking Step
Onion skins, celery ends, and herb stems quickly crowd half of your cutting board. Instead of placing a scrap bowl on the counter, loop a bag over the cabinet handle directly beneath your chopping area so trimmings sweep straight off the edge of the board. Likewise, instead of putting every individual ingredient in its own bowl, combine ingredients that enter the pot at the same time (such as diced onion, celery, and garlic for stuffing) into a single container.
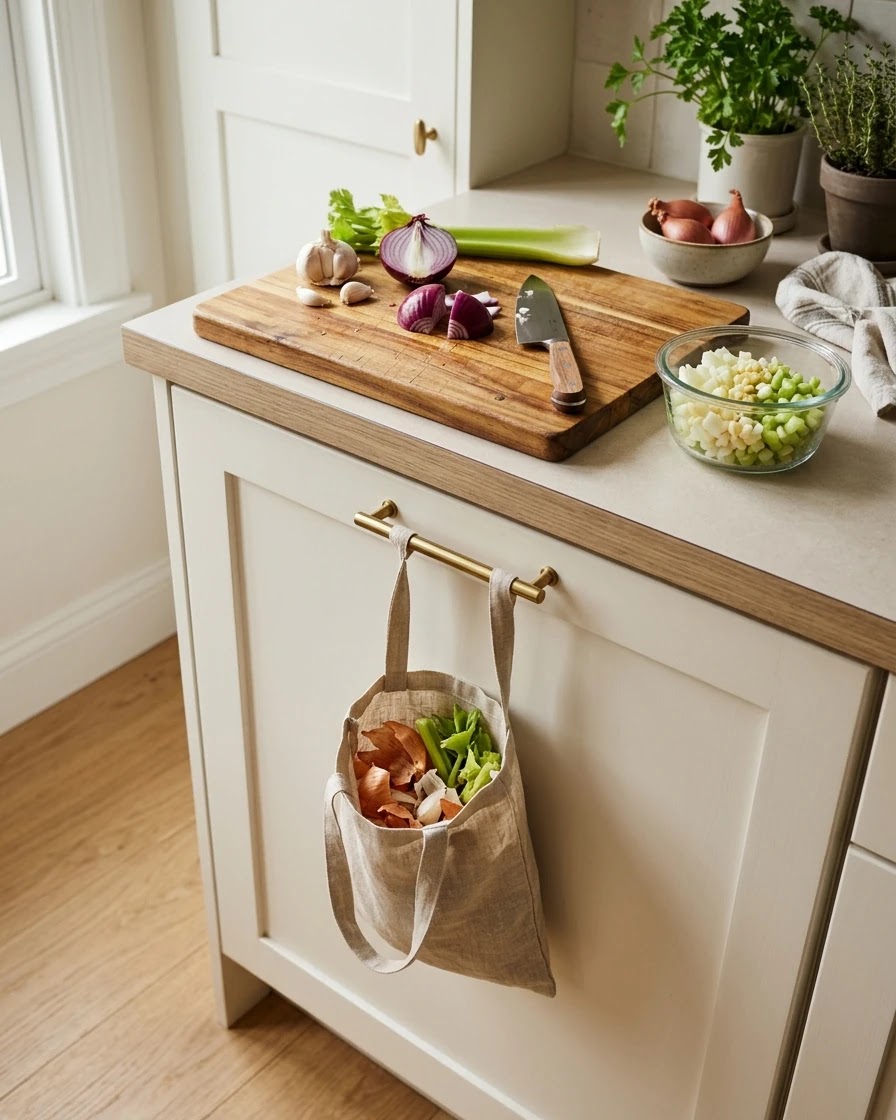
No-Purchase Alternative: Open the top kitchen drawer two inches, tuck the top edge of a grocery bag inside, and close the drawer gently to hold the scrap bag flush against the counter edge.
10. Spatchcock or Roast Turkey Parts on a Sheet Pan to Free a Second Oven Rack
A traditional whole trussed turkey stands 8 to 10 inches tall in a deep V-rack roasting pan, forcing you to remove the upper oven rack completely. Flattening (spatchcocking) a 12-to-14-pound turkey or roasting a bone-in breast alongside separate leg quarters on a rimmed half-sheet pan with a wire rack keeps the total height under five inches. Both oven racks stay in place, and a 14-pound flattened bird finishes roasting in roughly 80 to 95 minutes instead of 3.5 hours.
No-Purchase Alternative: Ask your supermarket butcher counter to remove the turkey backbone for you at purchase (most meat departments do this free of charge), and save the backbone to simmer your make-ahead gravy stock on Tuesday.
11. Use a Digital Thermometer & a 45-Minute Foil-Tented Rest to Bake All Sides
Repeatedly opening a small oven door to check the turkey drops internal oven temperature by 25°F to 50°F and throws off your entire timeline. Using a digital instant-read meat thermometer or leave-in wired probe thermometer lets you verify exactly when the deepest part of the breast reaches 160°F–165°F (and thighs reach 175°F) without guessing. Once removed and tented loosely with foil and a clean kitchen towel, a turkey stays piping hot on the carving board for 45 to 60 minutes—giving you a wide-open oven at 375°F to bake stuffing, sweet potato casserole, roasted Brussels sprouts, and dinner rolls simultaneously.
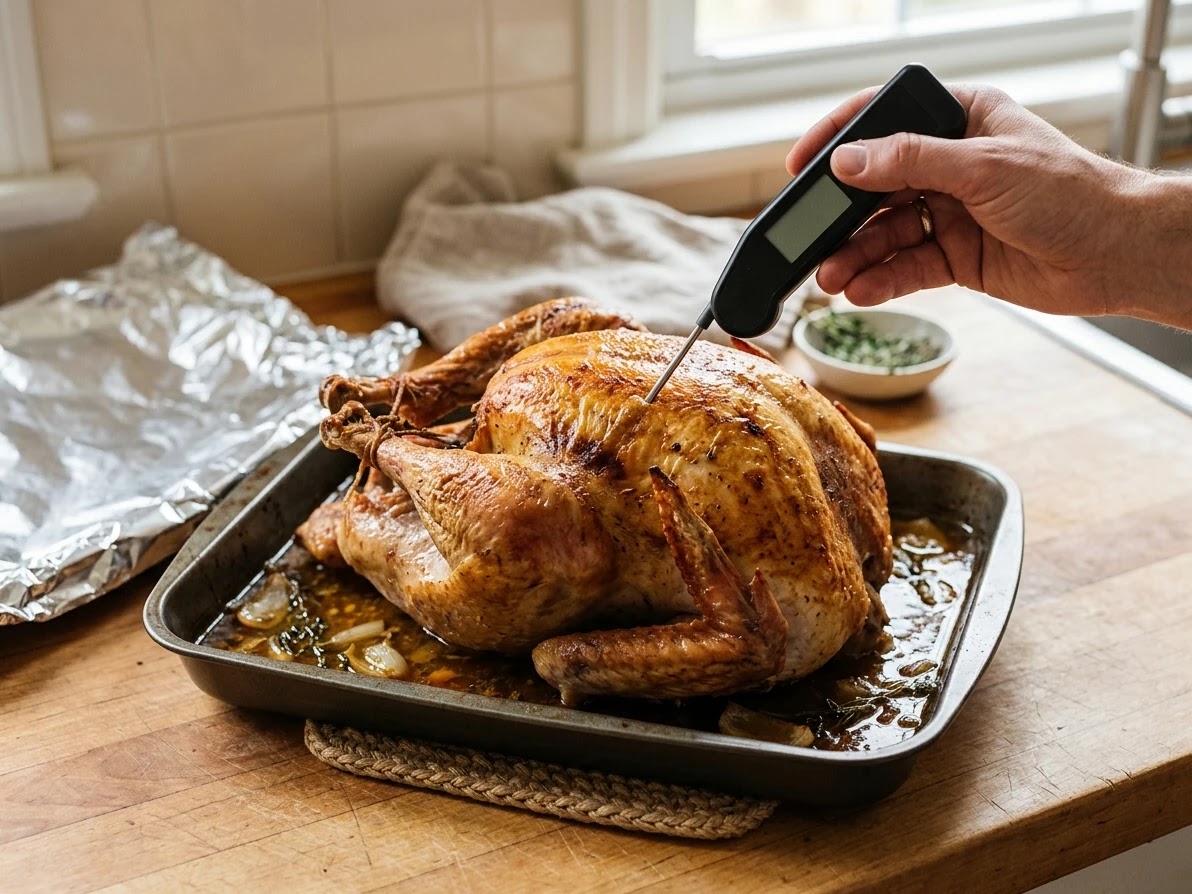
No-Purchase Alternative: If you only have a dial thermometer, calibrate it in a glass of crushed ice and water (it should read 32°F) before Thursday so you can trust its reading at the scheduled check time rather than opening the oven door early.
12. Hold Mashed Potatoes & Gravy Off the Stovetop in a Slow Cooker or Insulated Pot
Boiling and mashing five pounds of potatoes 20 minutes before dinner clogs your largest burner and fills the sink with colanders and mashers right when guests arrive. Make mashed potatoes two hours early (or Wednesday night), dot the top with butter, and hold them on the "Warm" setting in a slow cooker or multi-cooker plugged into an outlet in the dining area. Likewise, pre-made gravy can be held warm in an insulated thermos carafe until table service.
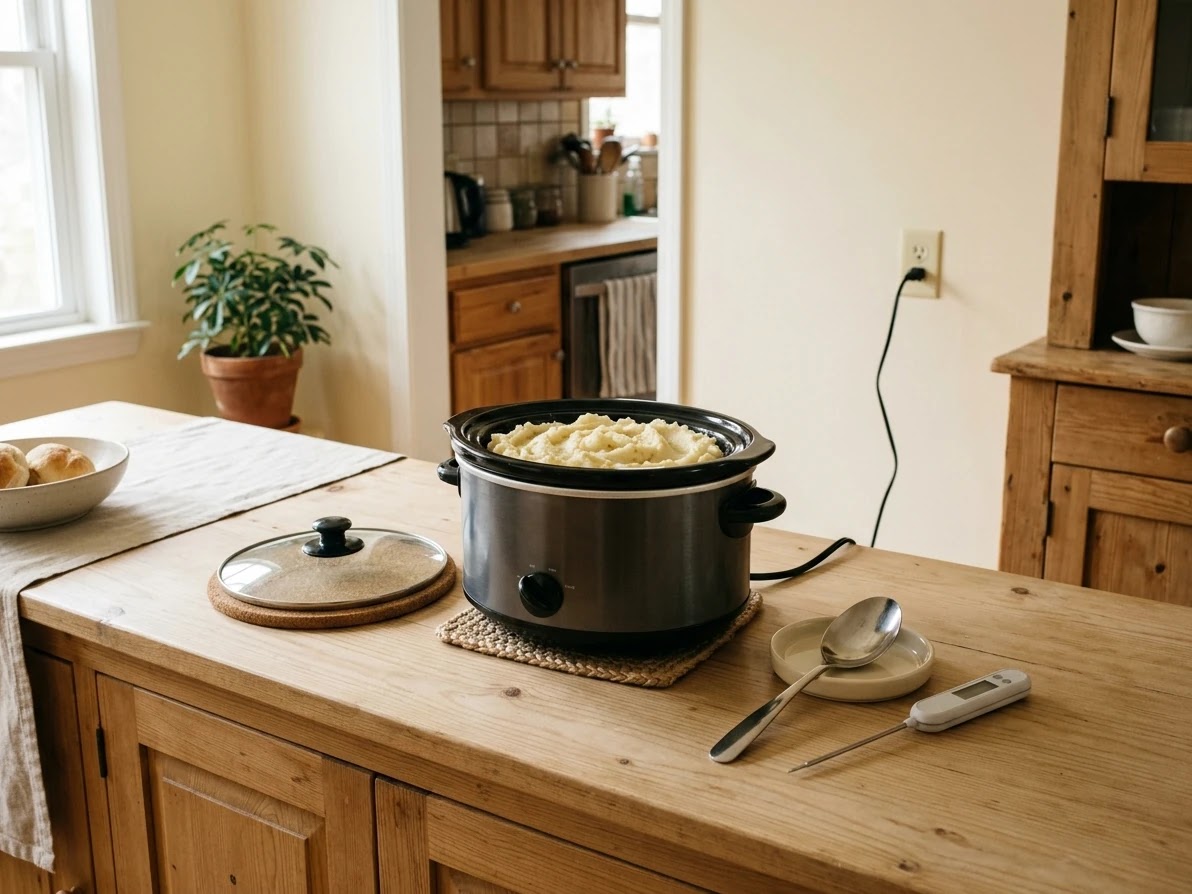
No-Purchase Alternative: Set a heatproof bowl of finished mashed potatoes covered tightly with foil over a pot of barely simmering water (double-boiler style) on your smallest back burner, or wrap the covered Dutch oven in two thick bath towels inside an insulated cooler to hold heat for up to 90 minutes.
13. Bake Sides in Straight-Sided 9×9 Square or Quarter-Sheet Pans Instead of Oval Dishes
Wide oval ceramic casserole dishes with flared decorative handles often prevent two dishes from sitting side by side on a standard 24-inch or 30-inch oven rack. Baking stuffing, green bean casserole, and sweet potatoes in straight-sided 8×8-inch or 9×9-inch metal or glass pans—or side-by-side aluminum quarter-sheet pans (9×13 inches)—allows two dishes per rack (four dishes total) with proper airflow around the edges.
No-Purchase Alternative: Before Tuesday prep, test-fit your empty baking dishes on your cold oven racks together and mark with a sticky note which two pans fit side by side on the top rack and which two fit on the bottom rack.
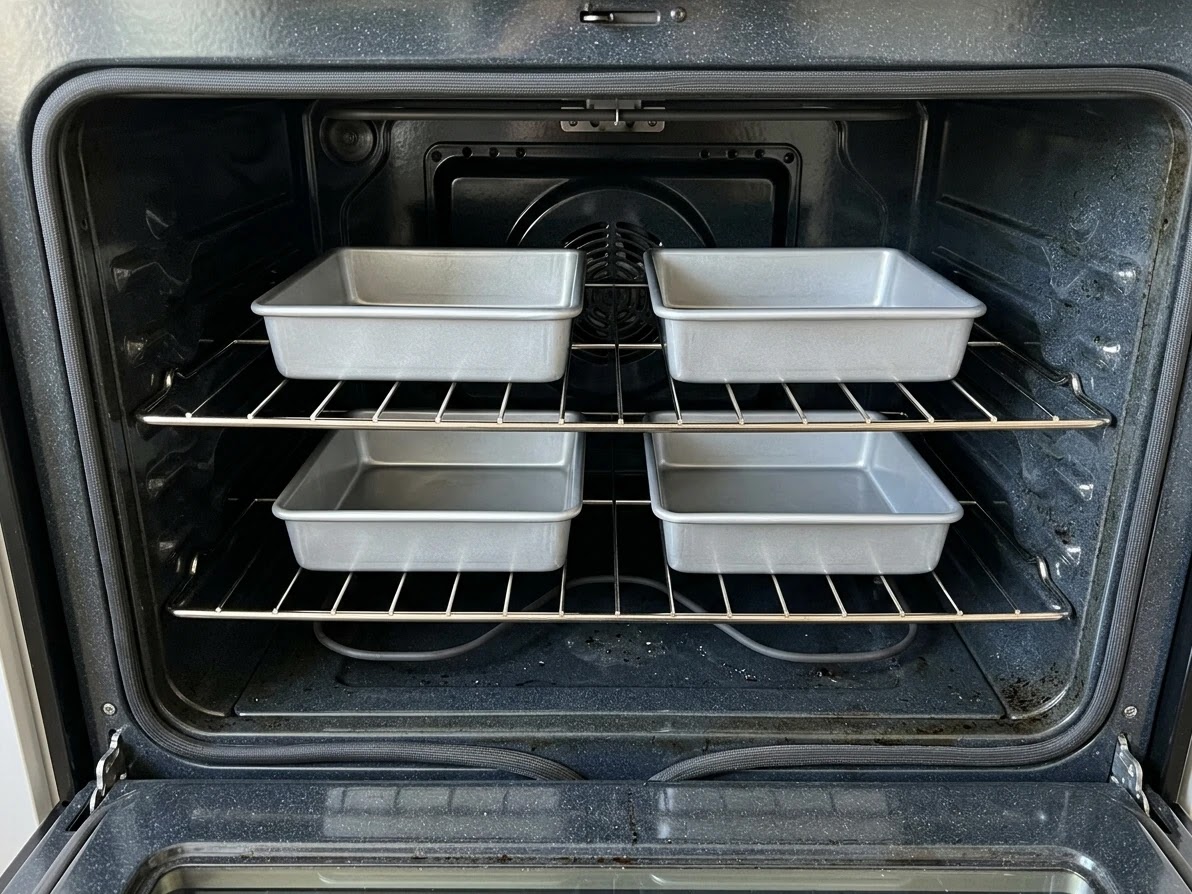
3-Tier Collapsible Cooling & Baking Rack Tower
Triples vertical counter space for Thanksgiving pies, cookies, and roasted sides, providing 300 square inches of cooling area in a compact 10x14 inch footprint for $22.
The Exact Spec That Wins: Reinforced steel wire with non-stick coating and 3-inch vertical clearance between tiers.
Honest Trade-Off: Not recommended for heavy cast iron Dutch ovens exceeding 15 lbs per tier.
14. Set Up a Self-Serve Drink & Appetizer Station Outside the Kitchen
The fastest way a small kitchen grinds to a halt is guests walking past an open 400°F oven door to grab ice, wine glasses, or snack refills. Place glasses, bottle openers, napkins, water pitchers, the beverage cooler, and room-temperature appetizers on a bookshelf, credenza, or entryway console table in the living room so guests never need to enter the cooking zone.
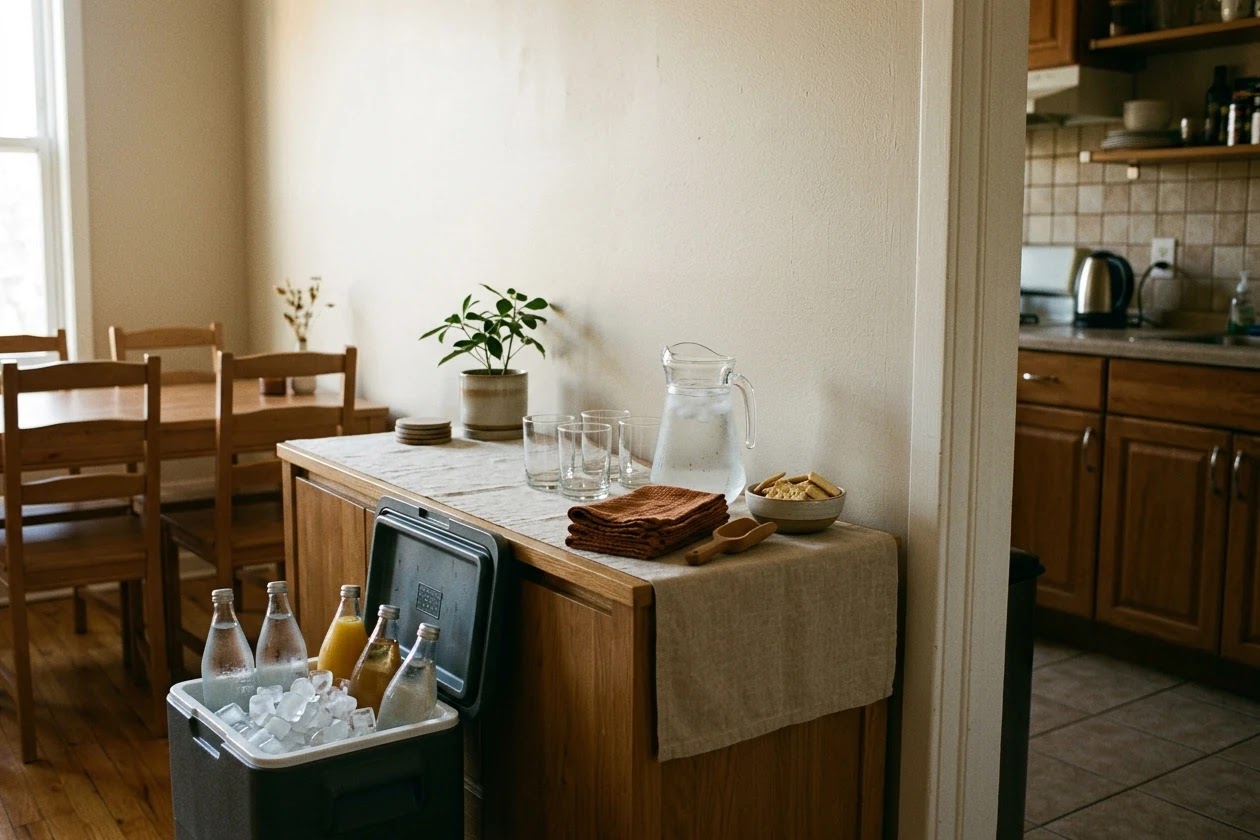
No-Purchase Alternative: Clear the top surface of a living room bookcase, windowsill, or desk and drape a clean runner or bath towel over it to create a dedicated self-serve beverage bar.
15. Pre-Label Platters & Match Serving Utensils on Wednesday Night
Small dining tables rarely have room for eight hot serving dishes, water glasses, wine bottles, and dinner plates all at once. Instead, carve the turkey directly onto a platter in the kitchen and set up a compact buffet line so plates arrive at the table already filled. On Wednesday night, place a sticky note inside each serving dish naming its side ("Stuffing," "Brussels Sprouts," "Cranberry Sauce") and lay the matching stainless steel serving spoons, slotted spoons, pie server, and locking tongs directly inside each dish so you are never digging through drawers while food cools.
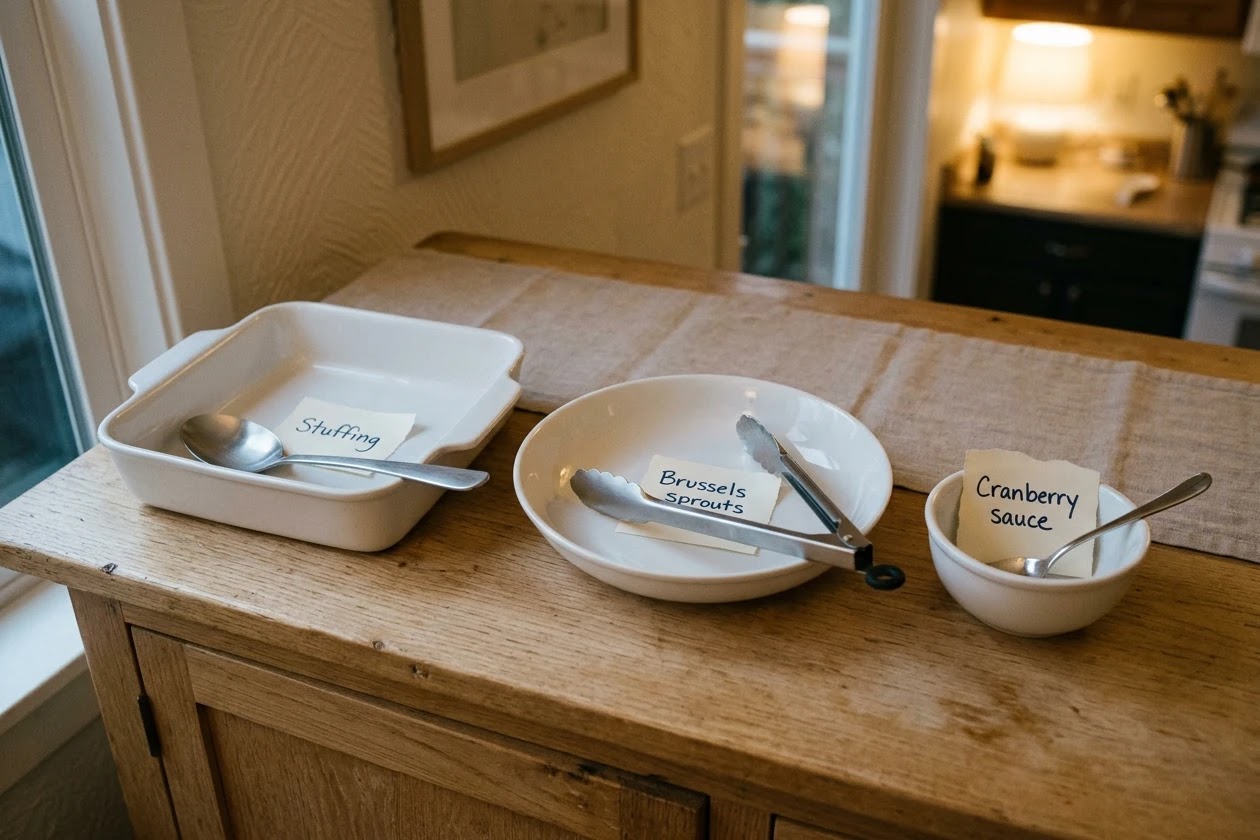
No-Purchase Alternative: Serve directly from clean straight-sided baking dishes set on folded dish towels (skipping separate decorative platters entirely) to cut your post-dinner dishwashing volume in half.
16. Start Thursday with an Empty Dishwasher & an Under-Sink Soak Tub
Run your dishwasher on Wednesday night and unload it first thing Thursday morning so every mixing bowl, measuring cup, and prep knife goes straight into the racks during morning prep. If you do not have a dishwasher—or for oversized items—keep a plastic dishpan or deep stockpot filled with warm soapy water on the floor beside the counter or inside the base cabinet so dirty utensils soak out of sight, leaving the main sink completely unobstructed for draining potatoes and washing hands.
No-Purchase Alternative: Fill your largest empty stockpot with warm soapy water as soon as you finish using it in the morning and use it as your utensil soaking basin until after dinner.
17. Pack Leftovers in Shallow 2-Inch Containers Within Two Hours
Putting bulky ceramic serving dishes covered in foil back into the refrigerator after dinner wastes massive shelf height and traps residual heat. Worse, USDA food-safety guidelines warn that cooked turkey, stuffing, and gravy should be refrigerated within two hours in shallow containers (two inches deep or less) so they cool quickly below 40°F. Carving all remaining turkey off the carcass and portioning sides into matching shallow rectangular leftover containers lets you stack an entire Thanksgiving feast on a single refrigerator shelf or send neatly sealed meal-prep portions home with guests.
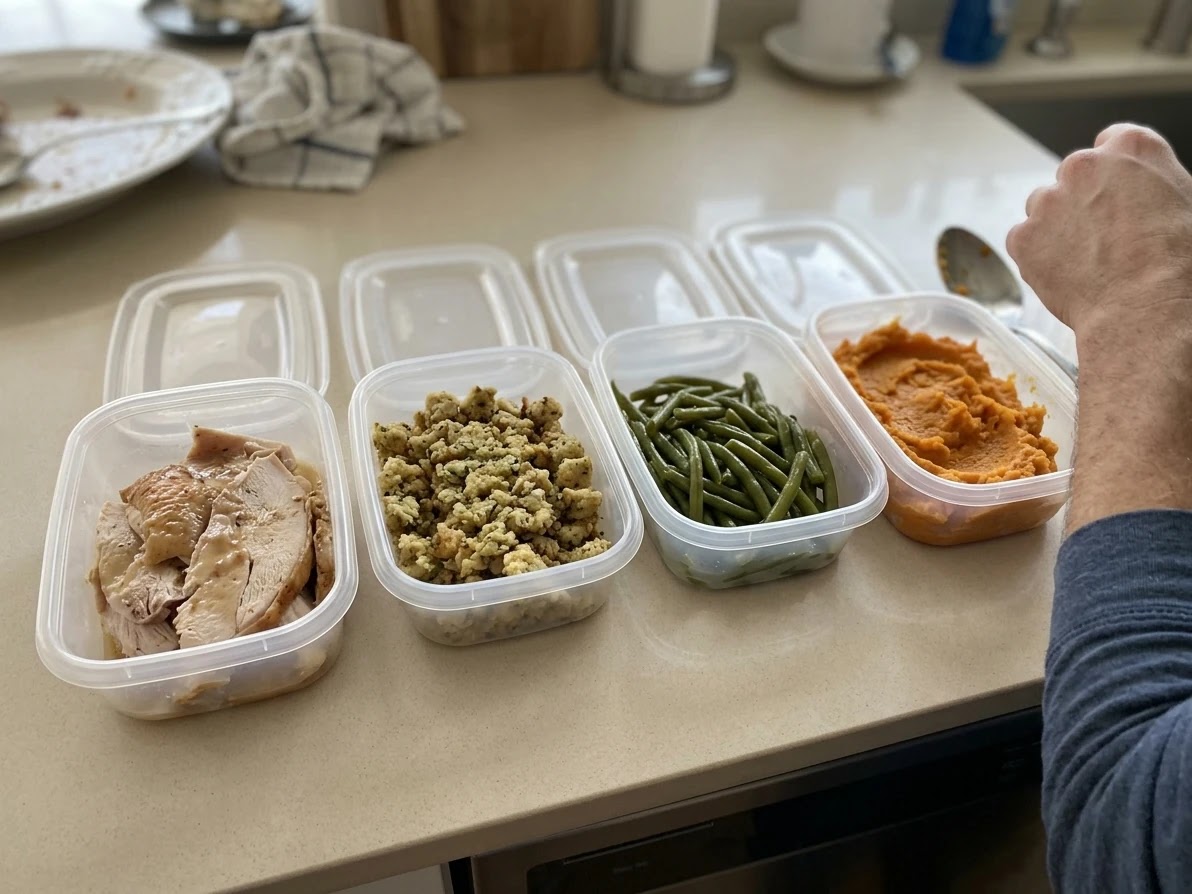
No-Purchase Alternative: Wash and save flat takeout containers during the two weeks before Thanksgiving, or portion sliced turkey and sides into labeled zip-top freezer bags pressed flat to a one-inch thickness.
The Small-Kitchen Thanksgiving Prep Timeline (Sunday to Mealtime)
In a compact kitchen, time is your biggest space multiplier. Whenever you chop onions on Tuesday or bake pies on Wednesday, those cutting boards, food processor bowls, rolling pins, and measuring cups are washed and put away days before the turkey ever enters the oven.
Optional Ongoing Family-Planning Tool: If your household wants a permanent year-round digital organizer for family schedules, reminders, shared grocery lists, meal planning, and refrigerator food-inventory tracking, consider a magnetic refrigerator-mounted display that takes up zero counter or wall space. Do not purchase a digital calendar solely for Thanksgiving—a free printed paper checklist or shared phone calendar handles a single holiday meal at zero cost—but for families seeking a daily kitchen command center all year, the verified option below attaches directly to the fridge door:

Everblog 13.4" FridgeCal™ AI Fridge Calendar (Magnetic Smart Family Planner)
Attaches directly to your refrigerator door via a magnetic mount—taking up zero counter or wall space—to coordinate family schedules, reminders, shared grocery lists, meal plans, and fridge food inventory year-round.
Best suited for households wanting an ongoing, year-round digital family calendar and fridge-inventory organizer. Do not purchase solely for Thanksgiving—a free printed paper checklist taped inside a cabinet door or a shared smartphone calendar app works just as well for a single holiday meal.
Affiliate Disclosure: We may earn a commission if you purchase through this link, at no extra cost to you.Thursday Single-Oven Temperature & Rack Schedule (Sample 4:00 PM Dinner)
Use this countdown schedule to sequence a single oven for a 4:00 PM Thanksgiving meal. If your dinner is at a different hour, simply shift each timestamp forward or backward by the same interval.
Comments
Post a Comment